While I was away at my fall scrapbook retreat this year, my husband completed a project that we had talked about off and on -- a fire pit in the backyard.
He was chomping at the bit to build a fire in it once I got home but the weather wasn't cooperating very well (very gloomy/rainy for about a week). We finally got to enjoy the fire pit a couple of nights last weekend. It was nice...
Happy fall, y'all! We'll be spending a lot of time around the pit in the coming months, I think. :)
Friday, October 18, 2013
Friday, March 29, 2013
pillowcase for my son...
So our almost 2.5 year old son has been in his big boy bed for about a month and half now. And he really hasn't had any trouble at all with the transition. So proud of him!
There are some dynamics, though, that come with a big boy bed, that you don't necessarily have with a crib.
Like a pillow.
Deacon didn't have a pillow in his crib -- only his lovey and a blanket. So when we made the transition we weren't really sure what we needed to do there. Should we get a bedding set for him? Or just put him in there with what he had was used to? We didn't have any bedding for him since we kind of decided on the fly to make the switch so that wasn't an option anyway. But we did have an extra pillow so we thought we'd try giving it to him to sleep on.
We actually tried both ways (with and without the pillow) and having the pillow in there actually keeps him laying the right way that will prevent him from falling out of the bed. So we kept it in there with his lovey + blanket (and another blanket we added).
But poor thing didn't even have a pillowcase!
He didn't care but mama started to. :) And, of course, I wanted something that would match what we already had in his room, without having to completely revamp. We didn't choose a very "baby" theme for his room so I plan to use it for aWHILE.
So I decided to make him a pillowcase myself. I found a really simple tutorial online and I am so impressed with how it came out! I mean the seams (even the inside ones) look professional and everything! :)
Take a look...
Sunday, March 10, 2013
fabric basket...
I've completed another sewing project, yay! These days it takes me days weeks to accomplish what someone could sit down and do in 4 or 5 hours maybe, but I just NEVER have that much time to just sew. I never have that much time to do ANYTHING really.
I barely get that much time to sleep.
So this project took me a few days/weeks of naptimes to complete, but complete I did. And that's the important thing, right?
More important than that, though, is photographing it and blogging about it, yes?! :)
I wanted to find something of substantial stability to keep my makeup in on the counter (or under the sink, if I could find a place in the madness that is our ONE bathroom cabinet). So I started looking online for tutorials for fabric buckets or baskets. I found one and modified it a little for my purposes.
But not too much, cuz that usually blows up in my inexperienced-beginning-sewer face.
The tutorial I decided to use had a flap that went over the entire basket so you could carry it with you when you travel. I have other bags I carry my toiletries in when I travel, so I decided to just leave that off. No big deal. But I also modified the pocket on the inside a little. The tutorial added a large pocket on the inside, but I divided the pocket into 2 sections to accomodate my makeup supplies and how I wanted to store them. Again, no big deal.
But I'm very pleased with how it turned out! It looks just like I thought it would, and it works. :) And check out that quilting -- first time I've tried doing that (well, other than these from my HomeEc class online) and I really think it adds to the stability of the basket.
Thursday, February 14, 2013
all you need is love. and a few hearts.
For some reason, I've been into decorating for Valentine's Day this year. This isn't a holiday that I usually put a lot of decorations out for. Usually just a little something on the door and maybe a candy dish that has hearts on it or something along those lines.
But maybe that was my thinking before Pinterest. In this new era with Pinterest, I've seen all kinds of ideas -- simple, mind you; and inexpensive, too -- to spread a little love in the house.
Cuz when love is in the house, then the house is packed, right?
Anyway, I am pretty pleased with the way my Valentine's Day decorations around the house turned out and wanted to share them here:
Made this with some coordinating papers and a couple of Cricut cartridges. I am so into the banner thing and we have the perfect space between our living room and kitchen to hang them!
Definitely stole was inspired by this idea from Pinterest...so simple but dramatic! I had the hearts and just strung them on some twine across our key holder by the front door (it's the closest thing I have to a mantle). Found the (free) printable on Pinterest and threw it in a frame I already had, and then moved a couple of frames in with it. I've had the tin for a few years -- got it from the Target dollar section (holla!).
1) hanging on our front door (got from Michael's a few years ago)
2) centerpiece on our kitchen table (had the flowers in another vase which I set right down in the bigger flower pot and threw some pink tissue in)
3) jewels from Pier 1 (I think?) -- just laid them out on the kitchen window sill
4) hanging from our kitchen light fixture (more hearts from that pack I had)
Wednesday, September 26, 2012
t-shirt makeover #1...
Well, I am quite proud of myself. I have completed yet another Pinterest project -- actually, a combo of a couple of different things I saw on Pinterest, which is the reason that this project took me more time than I thought it would. But then...don't most of my projects??
Anyway, the final result is pretty cool, in my opinion. But in order to appreciate the final result, you need to see what I started with:
This is one of my husband's XXL t-shirts. I found it in the bottom of his shirt drawer; not sure he's worn it 3 times since he got it when we were down in Daytona for Bike Week 7 years ago. But it's so cool -- it'd be such a shame to just throw it out (though we would probably give it away before we'd do that).
So I decided to have a crack at making it into a shirt for ME. That means A LOT of cutting. And sewing. And trying on and taking off, and trying on and taking off. More sewing, more trying on and taking off.
But I stuck with it and THIS is what I ended up with:
The Pinterest ideas I pulled from had me take a shirt I already had that I liked the fit of and trace it onto the shirt I was altering. Only the shirt I used for my template fit completely INSIDE the torso of Jeff's shirt!
Yeah.
That means I had to sew completely new sleeves. Never done that before. NOT a seamstress by any stretch. But I did it! And it looks like I might've bought it like that! What a feeling. I thrive on being able to say "I did that", no matter what we're talking about.
I think that's why I'm into so many different things.
That I never have time to mess around with.
Okay, back to the shirt. It's cool, right? I think so anyway, and I plan to do this again with another of my husband's awesome Bike Week shirts.
When I find the time. :: wink ::
Thursday, August 2, 2012
the ultimate silverware drawer...
Once again, my husband has come through with another phenomenal home project! We have two drawers in our kitchen. TWO. That's not enough, in my opinion. But that's what we have. As a result, I've crammed just about as much as I can into both of them. You can imagine that over time, they've been become pretty junky.
Even after I've tried to reorganize and reorganize every so often. I'm a fairly organized person (which some would translate into OCD, but whatev.) so the junkiness drives me bonkers after a while.
I got to a breaking point a couple weeks ago and asked Jeff if he could build me a custom divider to acommodate the silverware, food storage and miscellaneous other items I need want in there. Of course, that was just a challenge to build "the ultimate silverware drawer".
Which he did.
Of course. :)
Here's what I got:
Pretty awesome, right? He actually built a brand new drawer to acommodate that "secret" compartment, maximizing our space not only horizontally but vertically, too. He's brilliant, I tell ya. ;) I am loving my new drawer!
**Check out Jeff's post for more technical info on the drawer.**
Thursday, July 19, 2012
what's for supper?
Some would say Pinterest is "the devil". And if we're talking about all the yummy (READ: fattening) recipes you can find on there, or how long one can spend just looking (and looking and looking) at stuff, then I would tend to agree. However, it is also a God-send, some would argue, for the ideas you can get from it -- for anything from birthday parties to home decor.
So there you go -- both sides of the spectrum. Impressive.
More impressive than that, perhaps, is how many things I've actually pinned and DONE (made, crafted, cooked, baked, etc.). I should have a board called "Things I've pinned and done". Some folks do, you know. Mine would be relatively full. :)
And some of you won't have the slightest idea what I'm even talking about when I say Pinterest. It's basically a place online to "collect" things. Anything at all that you could copy a link to, you can "pin" it to a board of like/similar things. It comes in quite handy when you're planning an event (like a birthday party, baby shower, wedding -- ahem, SO wish this was around when we got married) or remodel of a room in your house, etc., or looking for gift ideas, or craft ideas or WHATEVER. Like I said, it could be AN.Y.THING.
Okay, I've spent enough time trying to explain it. If you haven't heard of or become a Pinterest addict by now, I think you're safe. :)
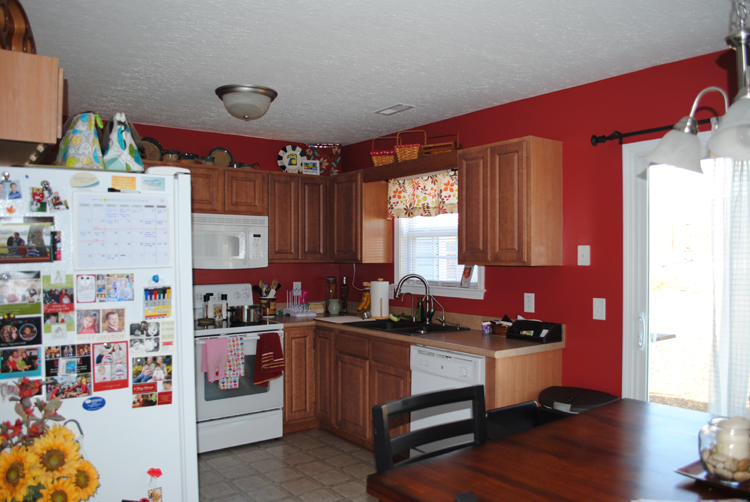
What I'm really posting about is my latest Pinterest project: a menu board for our kitchen...
This project is made up of:
- a wood frame which my husband built and painted for me (it's a shadow box style to cover the unused phone jack between our kitchen cabinets and the back patio door)
- a metal sheet to which I stuck the white dry-erase board sheets I found on Pick Your Plum (a daily email I get which I could also argue as "the devil" except for the DEALS I find!) -- so it's magnetic, too :)
- black vinyl that I cut with my "From My Kitchen" cartridge on my Cricut machine
- a lot of stress and backache as I stood/sat over this thing on the floor trying to get those flippin' lines straight and even!
The "Cook.Eat.Enjoy." phrase at the top was my idea. Kinda proud of that. :) And I love the way my "hanging" utensils/pots & pans turned out. That was my idea, too. Well, I mean, technically, the whole board design was my idea.
But I don't wanna brag. ;) I mean, I was inspired by Pinterest, remember...
This is the first week we've been using the board and it's been useful. I'm basically using it for suppers since that's the main meal we get to eat together as a family. I'm hoping that it will force me to plan a little bit for the week ahead so that I don't have to think DAILY about what I'm going to cook we're going to have for supper. Having a cute little board to plan with is good motivation. :)
So what's for supper, you ask? Well, let me look...
Wednesday, April 4, 2012
tulips make me happy.
My favorite flower is a daisy, but tulips come in an extremely close 2nd. So close, in fact, that I might have a hard time choosing between the two. I would be happy with either one, really.
Lucky for me.
Back in the fall, while I was away on a scrapbook retreat, my husband (and his mom) planted tulips for me in the front yard, along the sidewalk curve and in the space between our sidewalk and driveway. It was part of my birthday present but up until a few months ago, I didn't know anything about it.
One day I began to see things popping up through the pinestraw..."what's this?", I asked Jeff. He said, "Happy birthday! Again." Aren't they just beautiful?!
Everytime I look out my front door, I smile. :)
Friday, March 23, 2012
Home EC Class: Project 18
Laptop Case
Lessons learned:
working with foam
loop attachment for a button
Lessons learned:
working with foam
loop attachment for a button
I'm very pleased with how this project turned out. We have a fairly new laptop so I'm glad I waited to do this project until we had this one. It really wasn't as difficult in parts as I thought it might be, especially working with foam.
I think my style is to err on the side of "big" so there's plenty of room on either side of the case when my laptop is in there. I scored on the fabrics at Joann's since they were 1/2 off when I went to get my materials for this project. And I love how they coordinate. :)
I'm heading to a scrapbook retreat at the beach next weekend and I'll be taking my laptop with me so I'm psyched to have a super-cute case to carry/protect it in.
Saturday, March 10, 2012
whole lotta postin' goin' on...
And by postin', I mean, fence posts. I do have a few more blog posts to go with those I've already put up, but in this case, I'm talking about fence posts.
Backyard fence posts, to be more specific.
My handy husband built us a fence in our backyard (with a little help from a couple friends :). And it really looks great. I definitely feel better about going out there now, knowing that no strange dogs (or folks) will be running through our space (that actually happened to me last summer -- the dogs, not the folks).
Our neighbors on either side already had fences up, so we just had to put up the back and the 2 front gates on either side in the front. We opted for a 4 ft fence (though the sides are 6 ft where our neighbors put up theirs). Jeff said we're putting up a fence for security, not privacy. For keeping our kid(s) in, not keeping others out. I like that.
We are ready for the warmer weather to stay!
Monday, March 5, 2012
welcome, spring.
I've probably mentioned this before but I love living in NC. I was born here, raised here and would probably be content to live here until I die Jesus comes back. One of the reasons I do so love living in this fine state is because we get all 4 seasons here. Just about the time I'm getting tired of the season we're in, it's time for it to change anyway. Love that about NC.
That being said, our weather here on the coast has been a little whack lately, with temperatures bouncing ALL.over.the.place. Up in the low 70s one day, down into the mid 40s the next. It's kind of obnoxious but temporary which is what I keep telling myself. You just learn to dress in layers around here.
Uh, so I'm rambling here but I really just wanted to say that I'm excited about spring being right around the corner. My husband planted some tulips in our front yard at the end of September last year (for my birthday. while I was away for the weekend. yes, he's a keeper. :), and they've been making their way out of the pinestraw, even starting to bloom their beautiful yellow and red/pink colors.
It puts a smile on my face every time I look out the front door.
And speaking of, I made a (pinterest-inspired) spring wreath for said door. Though I had one idea in mind, I didn't get enough supplies so I had to cut to plan B, which really was non-existent until I saw how plan A was (not) going. So it's a straight-up miracle that this turned out as cute as it did...
For those who wonder how I made it (hi, mom!), I just used an 18 in wire/metal wreath frame that I already had, and covered it in wired ribbon. Then I punched out the cardstock flowers, butterfly & dragonfly from a book I already had and attached them to the wreath with brads. The "welcome" sign I cut out of cardstock with my cricut and a couple cartridges (Storybook and Lyrical Letters, I think) and then hung it with some string ("fun fibers").
The whole thing is VERY
Sunday, February 19, 2012
living room walls makeover...
And finally, the living room. I'm telling ya'll, my father-in-law WORKED while he was down visiting! Last up was the living room which he painted Saturday while we were away doing ministry with our church. When we got home, it was such a subtle change, I almost forgot that we were having those walls painted. But they look really good, especially with the accent wall...
That white trim just pops now with the khaki color on the rest of the walls. So thankful for my father-in-law's giving spirit and his more-than-adequate work! Our house looks great!
[paint color(s) in the living room: Fish Market and Homestead Ballroom Gold]
Saturday, February 18, 2012
kitchen walls makeover...
Next up on the list of walls to be painted was my kitchen. I am so unbelievably bummed that I didn't get any "before" photos of the kitchen before my father-in-law started painting. I was working (from home) that day and he was about 20 min in with paint already on the walls before it dawned on me that I didn't get any photos before he started.
I really thought I'd be able to find some photos of the kitchen that I could use as "before" photos -- just ones that I'd taken casually for other reasons. But no. Couldn't find any. Even more bummed.
But it is what it is. Or it was what it was. :) I think you can still appreciate how beautiful it is NOW:
See how nicely the shade of red goes with my Homestead Ballroom Gold accent wall? I really love how my kitchen looks now. And the paint on the walls helped motivate me to do some cleaning out to help "de-clutter" my countertops and get rid of some things that I hadn't used in years. That's always a good thing!
[paint color in the kitchen: Pedicure at Lunch]
Wednesday, February 15, 2012
hallway walls makeover...
So the next thing that Jeff's dad painted for us was our hallway. This is the only hallway in our house and it has the living room, Deacon's room, the guest bathroom and the office/craft room off of it. It's not very much space as walls go, but painting it really made a big difference, I think...
Such a pretty blue color...I used the shower curtain in the guest bathroom as inspiration for choosing the color for the hallway. I mean, there's nothing in the hallway to pull colors from, like there is in a bedroom or bathroom, right? So I was at first perplexed about what color to do in the hallway.
But then I decided that maybe it would be nice to use a shade of blue from the shower curtain since I probably wouldn't use blue in the bathroom, considering the curtain is mostly blue, with some other colors that I would could go with in that room.
Okay, I'm rambling.
I'm totally diggin' the hallway now. In fact, I keep flipping the light on every time I walk down, just so I can look at it. :)
[paint color in the hallway: Manitou Blue]
[paint color in the hallway: Manitou Blue]
Friday, February 10, 2012
master bedroom walls makeover...
Well, after almost 5 years in this house, we're finally doing something about these drab "bone" colored walls.
Jeff's parents are here this week visiting, getting in some quality time with Deacon and they are loving it. But in between those special times, we're putting my father-in-law to work. But he likes to work, so it's all good. :)
He is a (fantastic) painter so we decided before they got here that we were going to have him paint our bedroom. We were watching TV one night and a commercial came on for Lowe's or something that showed this beautiful shade of green in some room of a house and I don't know, I just went crazy over it.
Green is my favorite color, anyway, but with the white trim in the room they were using in the commercial, it just looked AWESOME. So I said something about that and Jeff asked me if we should have his dad knock it out while he was here.
Knock it out, he did! They flew in Tuesday evening, and when I got home from work Wednesday, it was done. And oh, was it beautiful! It is THE perfect shade of green for our bedroom...
I love everything about this color on my walls! It's so sophisticated and classy -- everytime I walk in there I feel like I'm in a house on Bald Head Island or something. Jeff really likes it, too.
Duane did a great job, yes? I am so happy with how it looks. And bless his heart, he's offered to paint any other rooms in our house, whatever we want/need. So we're taking him up on his offer, though I feel more badly about that than Jeff does. I hate for him to come down on vacation and we're putting to him work. But he has assured me that he doesn't mind, and as I said before, I think he likes to work. He likes to be busy, I'll say that. Whether this seems like work to him or not, I don't know.
So in the spirit of keeping Duane busy, most of our walls are getting a makeover this week. Check back soon to see what I mean!
[paint color in the master bedroom: Dog Park]
[paint color in the master bedroom: Dog Park]
Subscribe to:
Posts (Atom)


